Client-Side Validation in MVC 3
This post is part of the series I’m doing on the newly released ASP.NET MVC 3.
MVC 2 supported client-side model validation, but linking the client-side JavaScript and server-side attributes was tricky. Today I’m going to illustrate how this has been improved in MVC 3. I’m then going to show the same example in MVC 2 to illustrate how clunky the old client-side validation was in comparison.
How is it used
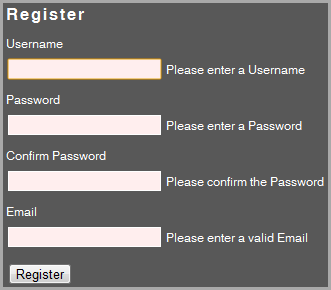
I’m going to continue with the example I did in my last post – a simple registration example.
public class RegisterViewModel
{
    [Required(ErrorMessage = "Please enter a Username")]
    public string Username { get; set; }

    [Required(ErrorMessage = "Please enter a Password")]
    public string Password { get; set; }

    [Required(ErrorMessage = "Please confirm the Password")]
    public string ConfirmPassword { get; set; }

    [Required(ErrorMessage = "Please enter a valid Email")]
    public string Email { get; set; }
}
Let’s see what happens if I enable the default client-side validation. To do this, we need to enable the configuration and include the jQuery validation scripts. (You need to put the call to enable client-side validation before the Html.BeginForm call)
<script src="@Url.Content("~/Scripts/jquery.validate.min.js")" type="text/javascript"></script>
<script src="@Url.Content("~/Scripts/jquery.validate.unobtrusive.min.js")" type="text/javascript"></script>
@{ Html.EnableClientValidation(); }You can also enable client-side validation in the Web.config file.

Voila! Let’s take a look at the generated markup.
<div class="editor-label">
    <label for="Username">Username</label>
</div>

<div class="editor-field">
    <input data-val="true" data-val-required="Please enter a Username" id="Username" name="Username" type="text" value="" />
    <span class="field-validation-valid" data-valmsg-for="Username" data-valmsg-replace="true"></span>
</div>
Again, the JavaScript for the validation is unobtrusive. Very nice.
So the built-in validation attributes will automatically generate the necessary HTML attributes to enable client-side validation. But what happens if we create our own validation attributes? MVC 2 had support for linking your client-side validation scripts to your custom server-side attributes – let’s see how this has changed in MVC 3.
I’m going to create my own attribute to check that a valid e-mail address is entered.
public class EmailAttribute : RegularExpressionAttribute
{
    public EmailAttribute()
        : base("^[a-z0-9_\\+-]+(\\.[a-z0-9_\\+-]+)*@[a-z0-9-]+(\\.[a-z0-9]+)*\\.([a-z]{2,4})$")
    {
    }
}
This attribute will take care of the server-side validation, but how do we link it to custom client-side validation? Firstly, we need to create a rule for linking the attribute to the client-side script.
public class EmailValidationRule : ModelClientValidationRule
{
    public EmailValidationRule(string errorMessage)
    {
        ErrorMessage = errorMessage;
        ValidationType = "email";
    }
}
Now we need to link our validation attribute to this rule.
public class EmailAttribute : RegularExpressionAttribute, IClientValidatable
{
    public EmailAttribute()
        : base("^[a-z0-9_\\+-]+(\\.[a-z0-9_\\+-]+)*@[a-z0-9-]+(\\.[a-z0-9]+)*\\.([a-z]{2,4})$")
    {
    }

    public IEnumerable<ModelClientValidationRule> GetClientValidationRules(ModelMetadata metadata, ControllerContext context)
    {
        yield return new EmailValidationRule(ErrorMessage);
    }
}
Right, so what about the actual JavaScript for doing the validation? We need to hook into the jQuery validation framework and reference the ValidationType (“email”) we declared on the server.
jQuery.validator.unobtrusive.adapters.add("email", function (rule) {
    var message = rule.Message;

    return function (value, context) {

        if (!value || !value.length) {
            // return valid if value not specified - leave that to the 'required' validator
            return true;
        }

        var emailPattern = /^[a-zA-Z0-9._-]+@[a-zA-Z0-9.-]+\.[a-zA-Z]{2,4}$/;
        return emailPattern.test(value);
    };
});
And that’s all we need. The jQuery validation code will automatically trigger our code for properties where our attribute is used.

How to do this in MVC 2
I mentioned that all of this was already possible in MVC 2 – let’s implement the same scenario in MVC 2.
Enabling the client-side validation works exactly the same, but we need to reference the Microsoft validation library, not the jQuery one. This also means we won’t have the nice unobtrusive JavaScript we have in MVC 3.
<script src="<%=Url.Content("~/Scripts/MicrosoftMvcValidation.js") %>" type="text/javascript"></script>Now let’s take a look at how we link the client-side JavaScript with a custom server-side attribute. Instead of the custom attribute simply referencing the rule, we need to create a validator to link the attribute and the rule (in addition to the rule and attribute).
public class EmailValidator : DataAnnotationsModelValidator<EmailAttribute>
{
    private readonly string errorMessage;

    public EmailValidator(ModelMetadata metadata, ControllerContext context
      , EmailAttribute attribute)
        : base(metadata, context, attribute)
    {
        errorMessage = attribute.ErrorMessage;
    }

    public override IEnumerable<ModelClientValidationRule>
     GetClientValidationRules()
    {
        yield return new EmailValidationRule(errorMessage);
    }
}
We also need to register this validator on startup.
protected void Application_Start()
{
    DataAnnotationsModelValidatorProvider.RegisterAdapter(typeof(EmailAttribute), typeof(EmailValidator));
}
Our custom JavaScript also needs to reference the Microsoft namespace.
Sys.Mvc.ValidatorRegistry.validators["email"] = function (rule) {

    var message = rule.ErrorMessage;

    return function (value, context) {
        // return valid if value not specified - leave that to the 'required' validator
        if (!value || !value.length) {
            return true;
        }

        var emailPattern = /^[a-zA-Z0-9._-]+@[a-zA-Z0-9.-]+\.[a-zA-Z]{2,4}$/;
        return emailPattern.test(value);
    };
};
The client-side validation in MVC 2 suddenly seems very clunky – even without comparing the generated HTML (which is also much simpler in MVC 3).
The fact that we can do away with the validator class is great – the new approach is more intuitive, less error-prone and requires less code. Instead of injecting JSON data into the page we now have custom HTML attributes – much neater.
Further Reading
Brad Wilson did a great post on the different types of validators available in MVC 3. Happy coding.